This is an integrated on-line bespoke Log search, OQRS and QSL Manager application. It offers useful tools for DXer’s, DXpeditions and strongly supports the QSL manager’s workload, automating the most time consuming QSL’ing processes.
Below I share some useful Tips & Tricks about the front-end user interface from our OQRS.
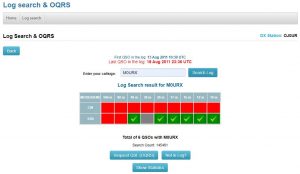
On the Log search opening page, first you need to select the DX station you want to check its log. Please note, that the drop-down list and selection is interactive. Start to type the DX station callsign than the list will be filtered and only the DX station(s) shown in the list which match the characters you typed. In combination with typing the callsign you can use the mouse or the up and down arrow keys for making the selection. When the selection jumps to the desired DX station than hit Enter to open the search form and you are ready to search the selected station log.
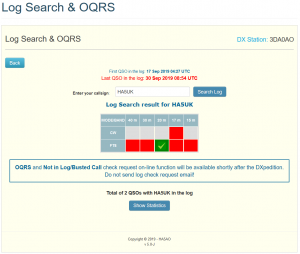
“OQRS and Not in Log/Busted Call check request on-line function” is only available when it is enabled by the QSL manager.
Pay attention to the time stamp of the “Last QSO in the log” If you are not in log, work again or wait until the Log check request function is enabled.
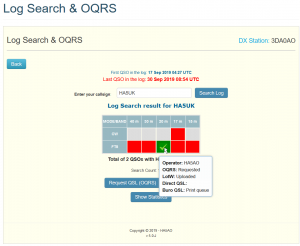
When you read “Total of 2 QSO’s” and only 1 green tick this is because the log shows that you have two QSOs on that band and mode. When requesting the QSL both QSOs will appear in the QSL request form. You must enter the correct data for each QSO.
When the OQRS is opened, the “Not in Log” function is also enabled. For more information see the Not in Log process below.
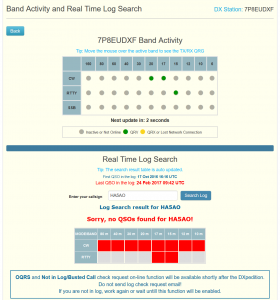
Move the mouse over the green check-mark to see your QSL status. Visit back frequently for the update.
Band Activity Module
If the Band Activity Module is enabled move the mouse over the green spot to see the TX and RX QRG of the station. If no QSO broadcast and received by system for more than 5 minutes than the green colour changes to yellow. It means that the station QRX or lost the network. After 15 minutes if no QSO received the station considered inactive or not connected to the network. If all spots are grey, then no operation or the internet connection is lost at the DXstation side.
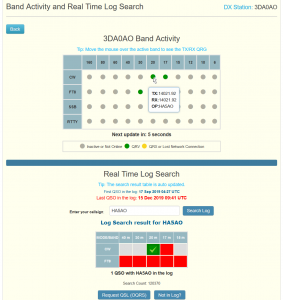
Real Time Log Search
If the Band Activity Module is enabled, the Log Search is changed to Real Time.
Write your call sign in the input field, press the Search Log button then start working with the DXstation.
If you are in the log, the green check-mark pops up automatically at the next refresh in the search result field. No need to press the button.
If it was your first QSO with the station the “Sorry, no QSO found for xxxx” text will disappear.
OQRS Process
The OQRS and NIL? button are shown when the OQRS has been opened by the QSL manager.
If your QSO is not in the log then first click on the “Not in Log?” button on the log search page and send the on line log check request before processing the OQRS. See more information below under the Not in Log process.
The OQRS process requires three single steps to claim your QSL card.
Step 1.
Fill the fields with your QSL details. Alternatively, if you have many QSOs you can upload a standard ADIF file containing your QSOs with the DXstation.
Each QSO on Step 1 is DATE & TIME specific with small time tolerance. Outside the correct date and time it will show as a “Mismatch”
If you previously claimed one or more QSO’s and the request again function is not enabled, then those fields are grey (not active) If the request again function is enabled by the QSL manager, then you can claim again with some restriction. If you claimed bureau cards before, then you can request direct card again.
You also can check the QSL status on the right, Print queue or Sent.
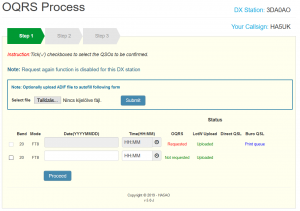
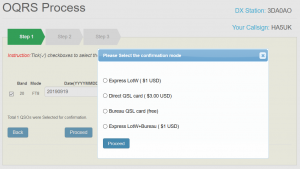
Click on the Proceed button than you can select the QSL mode.
The available modes are defined by the DXstation, and enabled / disabled by the QSL manager accordingly .
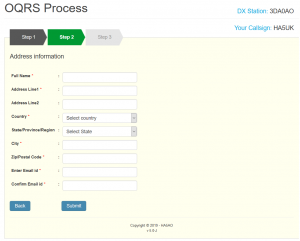
Step 2.
On Step 2 you are asked for your email address if you selected bureau card, do not write anything in the QSL manager field if you have no QSL manager.
Write the QSL manager callsign if you want your QSL sent to you manager.
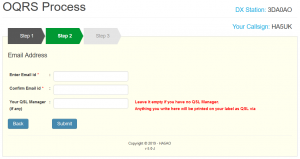
Also in Step 2, the direct QSL card will be posted to the address you write here. We DO NOT use your PayPal address for the QSL posting.
Your postal address must be written in FULL.
For USA residents i suggest you use the full 9 digit ZIP it is more accurate for delivery.
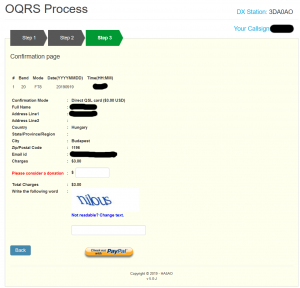
Step 3.
Check the details of your claim and you can finalise the process.
If your claim is payable, clicking on the PayPal button you will be redirected to the PayPal secure site to complete the transaction.
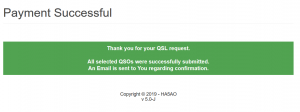
When the transaction is successful you will see the “Thank you” page and an email is sent to you with the details of claimed QSOs. Your QSOs marked for processing the QSL in the database.
Check in the log search result window by moving the cursor over the green marks.
You should see “Print queue”
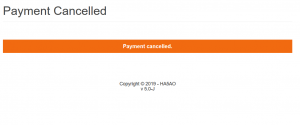
You may cancel the transaction. In this case your PayPal account is not charged and your QSL will not be processed.
If you have any issues with the PayPal transaction or receiving the OQRS Direct QSL then please contact the QSL manager and refer to the PayPal transaction ID:
Not in Log? Process.
The Log Check Request Form is available when the OQRS has been enabled by the QSL manager. Click on the “Not in Log?” button in the Log search result window to open the form. Do not send any email. I will not answer and will not make any action for email request. Use this form only! It helps to reduce the QSL manager’s workload and you receive answer more quickly for your log check request.
Please note: Only one request is allowed for the same call sign for the same log.
Please do not add QSO’s that are correct in the log. ONLY NIL’s or BUSTEDs or Unmatched.
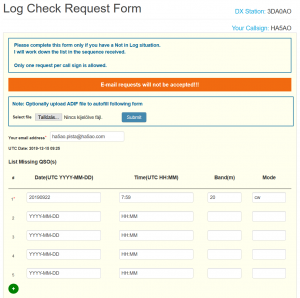
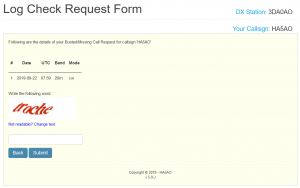
Check the details and submit your request. You will receive an answer via email.
Finally, please DO NOT send ANY bureau cards through the Bureau to us for DX’peditions. You MUST mark your log as QSL SENT.
If you send Bureau cards this causes double the workload and wastes huge amounts of time and money and this is NOT welcome.
Thank you.
Acknowledgements – Thank you to HA5AO Pista for his collaboration and permission to print.